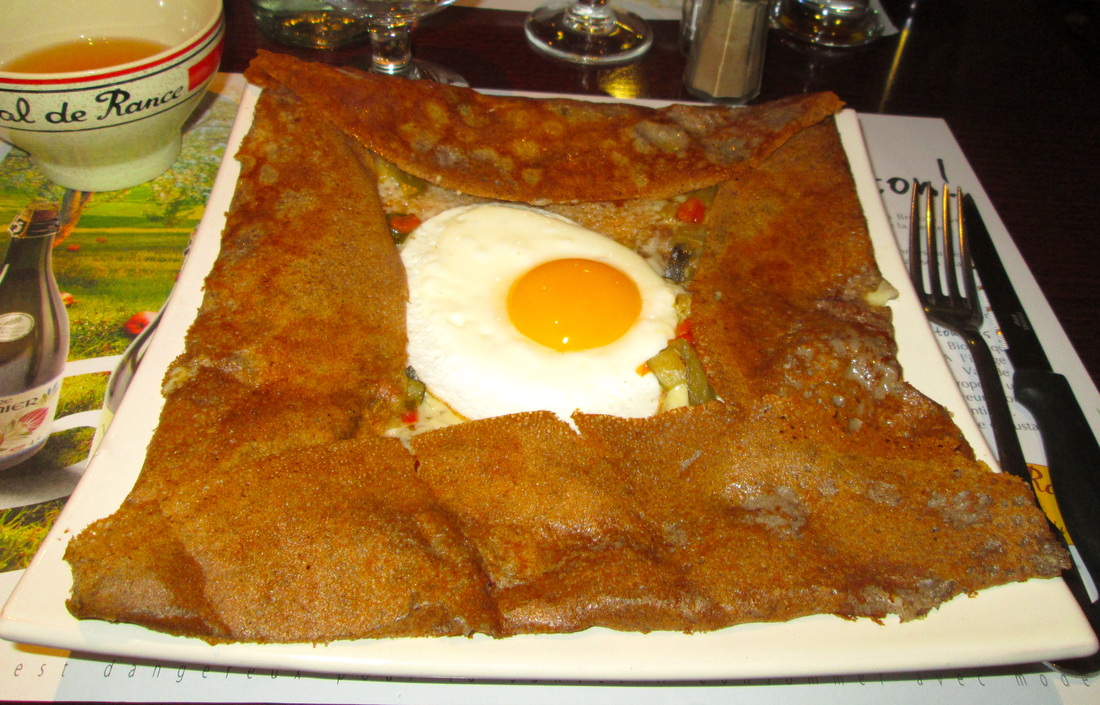
 Galette filled with veggies and decorated with an egg. Galette filled with veggies and decorated with an egg.
Brittany is a Celtic region of France located on a ragged-edged peninsula that sticks out into the Atlantic Ocean. The mainstays of the rural region's economy are fishing, farming, and tourism. Long isolated from the rest of France, over the past two centuries Brittany has gradually absorbed some French customs, and most Bretons today speak French and wear modern Western clothing.
Still, traditional Breton customs remain strong. People still eat the traditional very thin pancakes called galettes and crêpes by themselves or stuffed with fillings. Traditionally, these simple breads contained only flour, water, and salt. Today people usually add butter, milk, and eggs to the batter.
These pancakes differ in two ways. First, galettes contain buckwheat flour, whereas crêpes contain wheat flour. Second, galettes usually have savory fillings, whereas crêpes usually have sweet fillings.
Buckwheat does not contain gluten and thus is safe for people with gluten allergies or intolerance to eat. (However, before ordering a galette in a restaurant, ask your waiter about its preparation. Sometimes white wheat flour is added to lighten the galette. Also, the chef may use the same equipment to make both galettes and crêpes.)
Galettes date back to the 1100s, when Crusaders coming home from fighting the Saracens introduced buckwheat to Brittany. Even today, sarrasin remains a French word for buckwheat. Crêpes first appeared in the early 20th century, when the price of white flour first dropped low enough that poor people could afford it.
 Sparkling cider from Brittany. Sparkling cider from Brittany. Traditionally, Bretons drink sweet (doux) or dry (sec) cider with their pancakes. This lightly alcoholic drink is sparkly.
Although cultural transmission has historically been from the dominant culture of France to the isolated culture of Brittany, Gallic France has adopted the Breton custom of eating galettes and crêpes. Crêperies (restaurants that serve these pancakes) can be found in places throughout France. Also, the French celebrate the Roman Catholic holiday Candlemas (2 February) by eating galettes and crêpes.
Many food cultures include flat pancakes made of ground grain and water. These include blinis (Russian), blintzes (Eastern Europe), sopes (Mexican), and dosas (Asian Indian).
—Shauna
More than a hundred stalls shelter under the hideous metal roof of le Marché des Capucins (the Capuchin Market) and spill out onto the sidewalks on two sides. This open-air market in Bordeaux first opened in 1749 in le Place des Capucins (named after the Capuchin order of monks). The market continues today near Place de la Victoire in a neighborhood of restaurants and ethnic stores.
The vendors encompass all you would find at an American farmer's market—and more: Butchers, bakers, caterers, florists, cheese merchants, fruit and vegetable sellers, wine merchants, olive sellers, oyster sellers, fishmongers, tripe sellers, and poultry dealers. Also, some stalls house tiny restaurants and sellers of cheap imported goods.
—Shauna
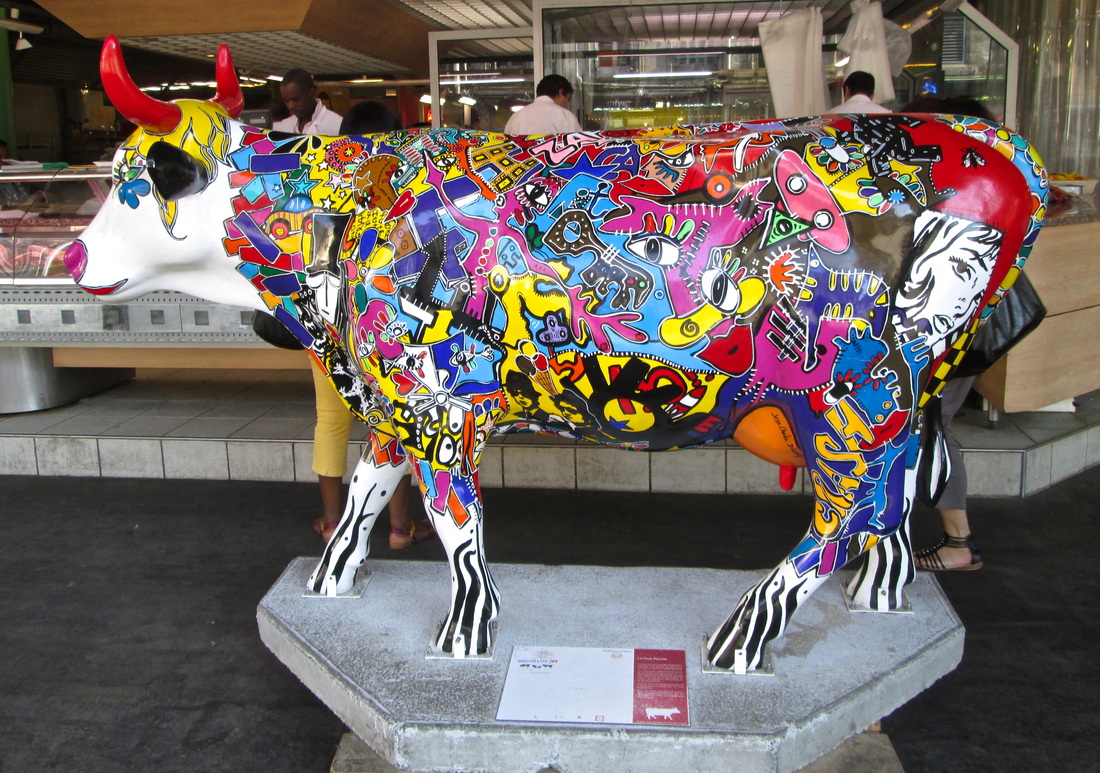
Painted fiberglass cow (in front of a butcher's stall) welcomes you to the market.
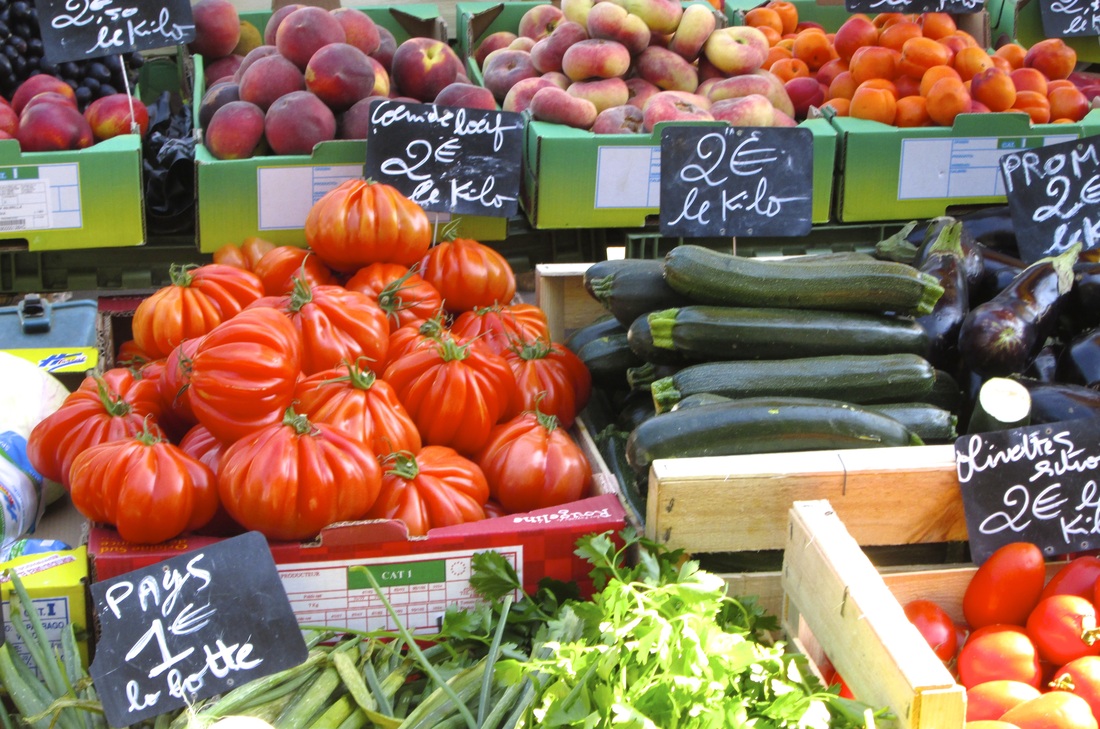
One of many colorful vegetable and fruit stands. Note the corrugated tomatoes. They have few seeds, so they may be a sauce tomato.
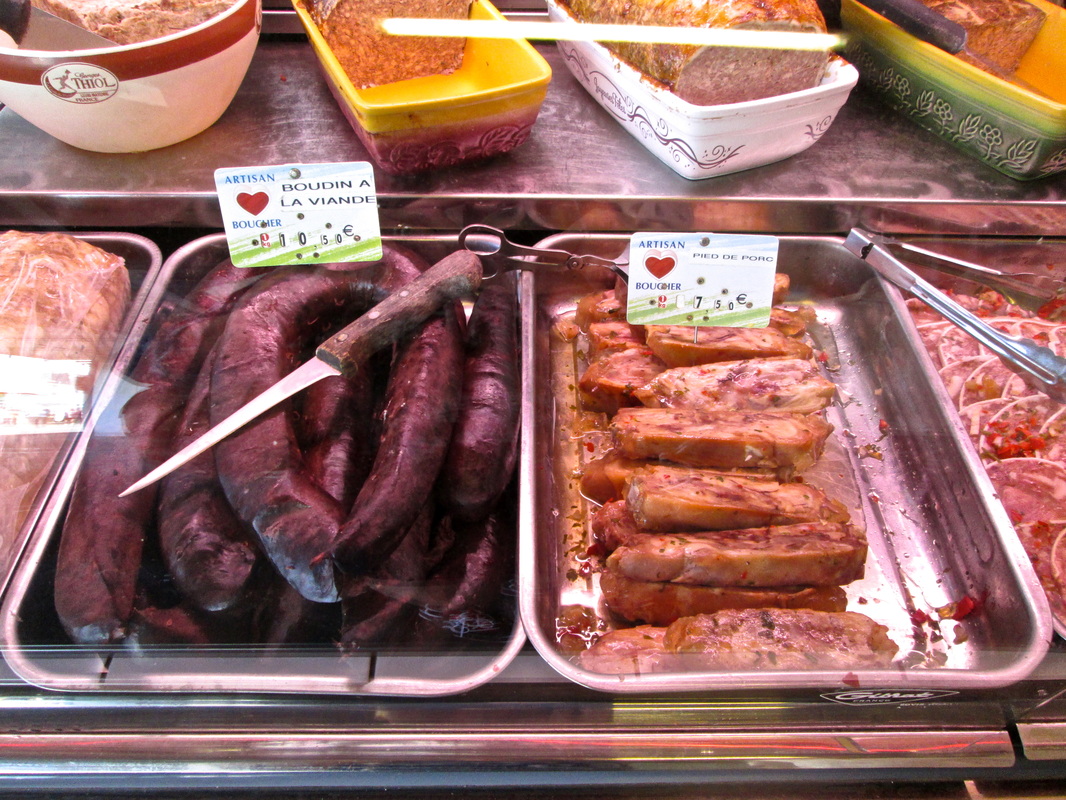
Sausages, cuts of pork, and patés. The foods of Bordeaux and the rest of Aquitaine are rich and heavy.
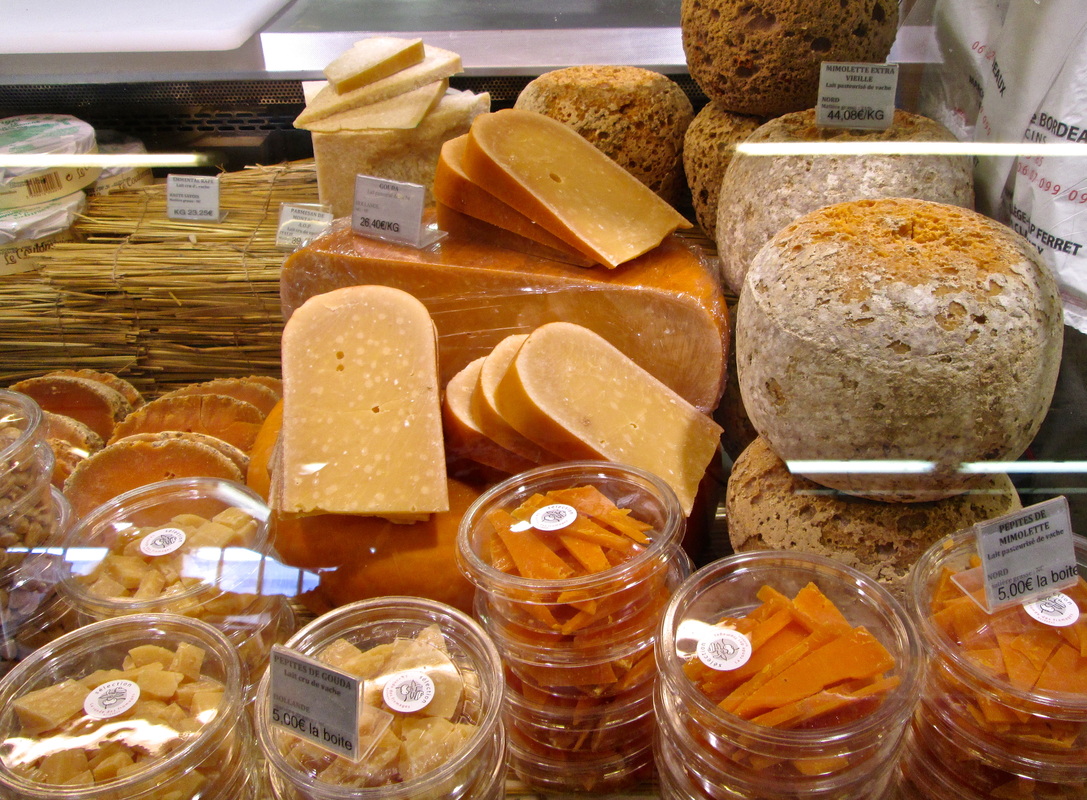
Cheeses. Almost all the cheeses at the market are locally made, and the signs tell you where, as well as what kind of cheese they are, what animal (cow, goat, or sheep) the milk came from, whether the milk was organic, and whether the milk had been pasteurized or not.

Purses, purses, and purses. And not the prices I expected: All of the purses visible here were at least 35 euros. They were cheap only in quality.
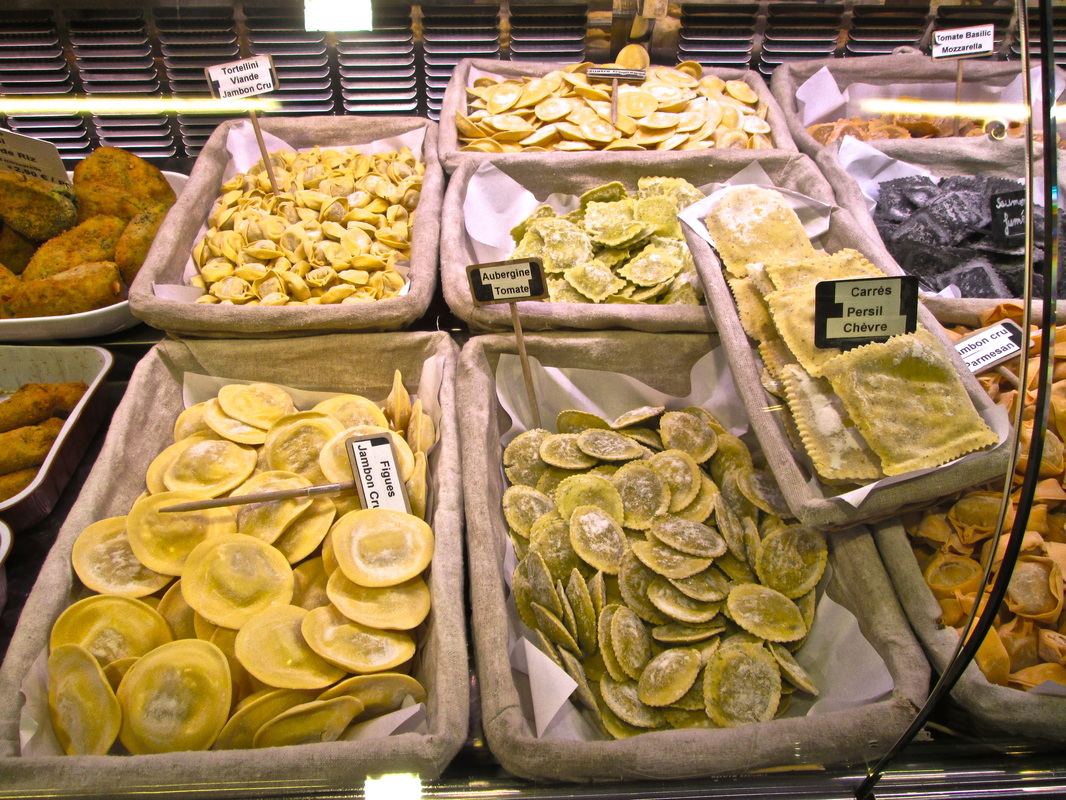
Italian foods, included several kinds of stuffed pasta.

More kinds of cheeses.
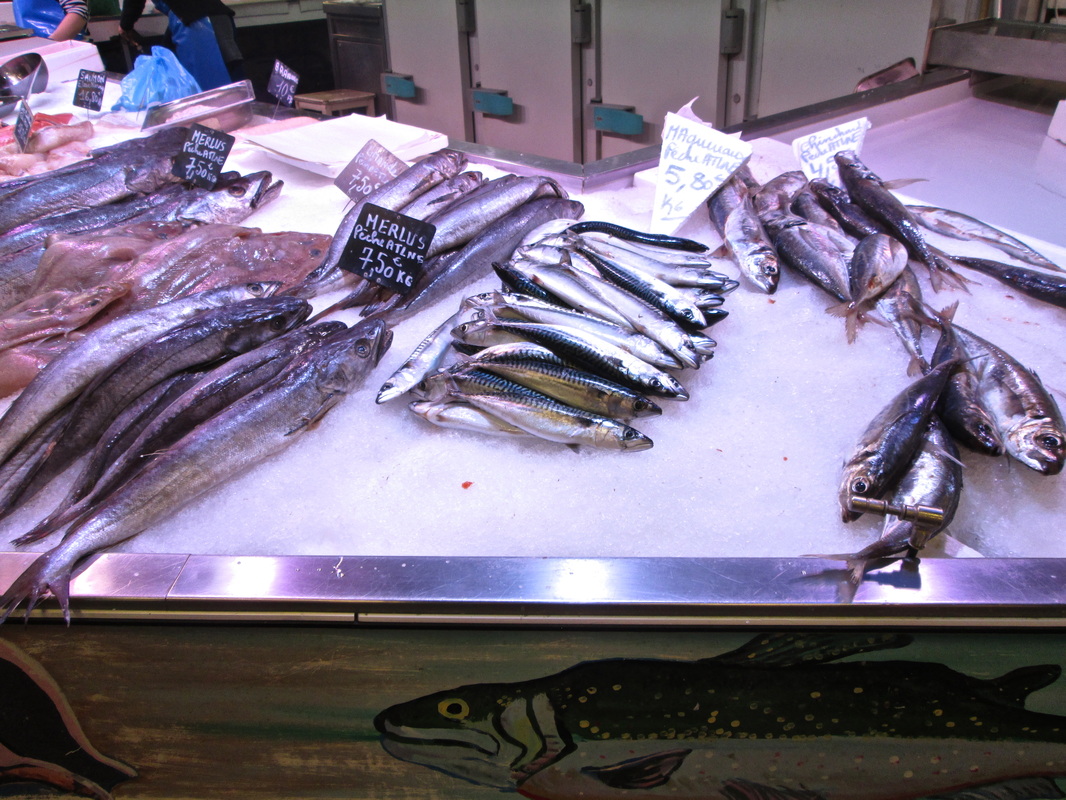
Fresh hake of various sizes. (Hake is a relative of cod.)
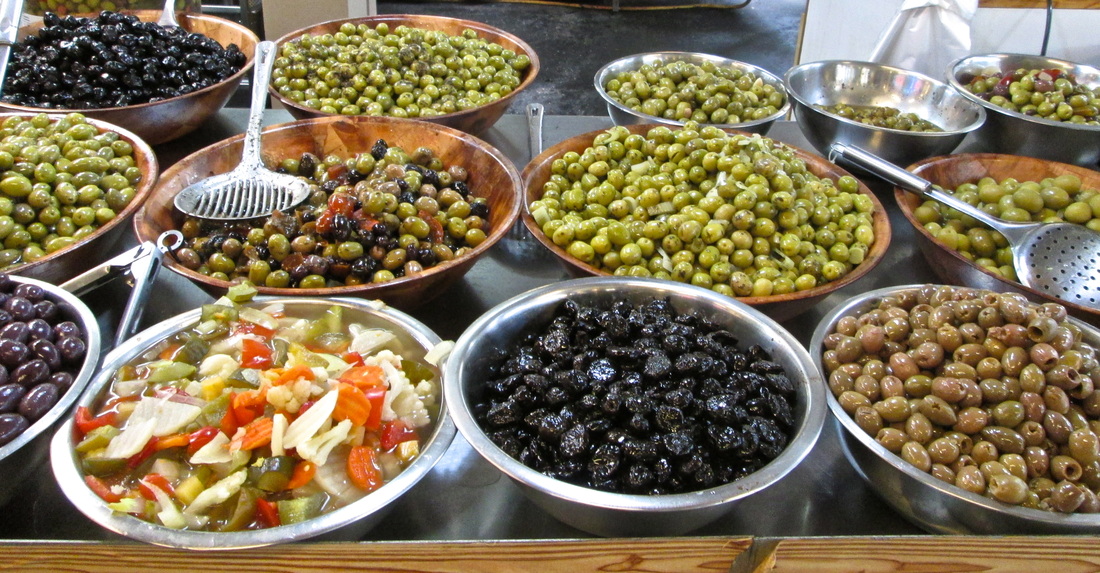
Olives and olive salads.
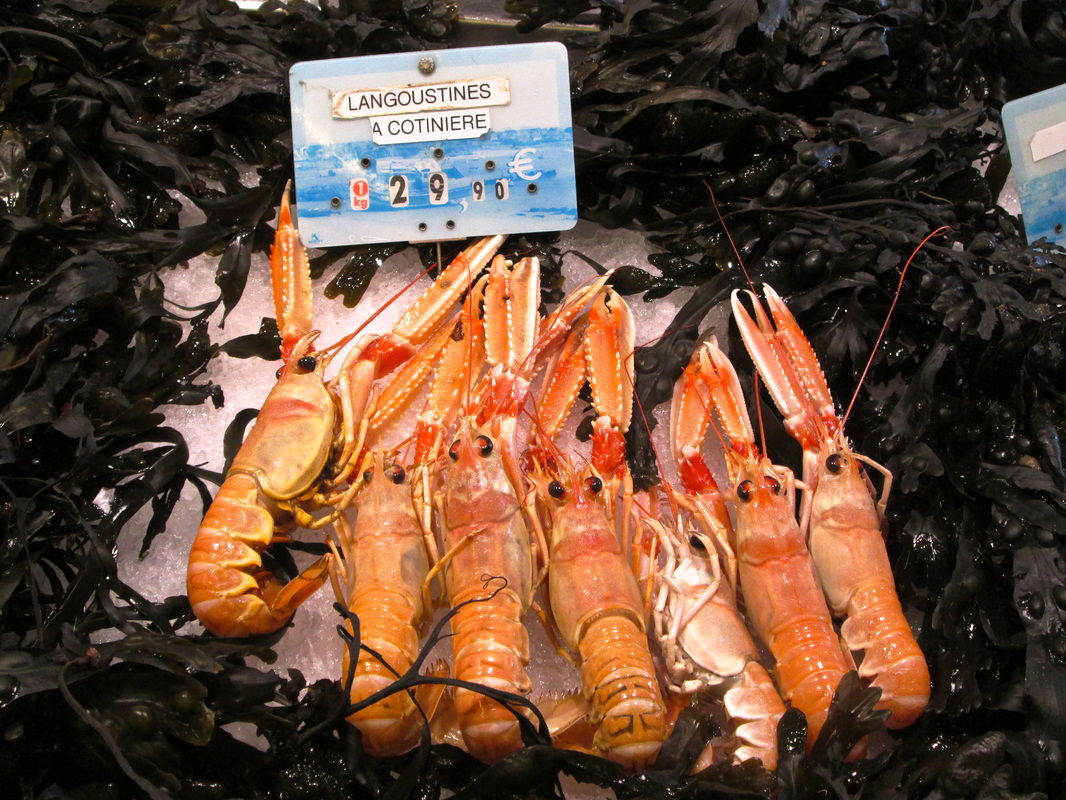
Small lobsters. Note that they are cheaper per kilogram than some of the cheeses shown earlier.

Animal legs? I did not approach closely enough to read the tags.
 One of the most magnificent feasts in history celebrated the completion of the Assyrian palace in Kalhu (also called Nimrud, a city that once lay north of Baghdad) in 879 B.C.E. (before the Christian era). King Ashurnasirpal II wasted no time upon becoming king of Assyria (part of modern-day Iraq) in roughly 883 B.C.E. Thirsting for war and riches, he immediately invaded north, east, and west, conquering the people there. The Syrians soon rebelled against his savage rule. His response: Burn the small children to death, and mutilate the grown men. Some had their hands and feet cut off; others lost their ears, noses, and lips. Content that no one would revolt again, Ashurnasirpal II took his plunder home to Assyria and celebrated by forcing thousands of slaves to build him a luxurious new capital city at Kalhu. When the palace—built from imported luxury woods, limestone, and alabaster—was completed in 879 B.C.E., he held a feast for nearly 70,000 people from several countries that lasted 10 days. According to Ashurnasirpal's own words, the supplies he ordered for the banquet included: - 1,000 fattened head of cattle
- 1,000 calves
- 10,000 stable sheep
- 15,000 lambs
- 200 head of cattle (for offerings to the goddess Ishtar)
- 1,000 sihhu-sheep (for offerings to Ishtar)
- 1,000 spring lambs
- 500 gazelles
- 1,000 ducks
- 500 geese
- 500 kurku-geese (possibly cranes)
- 1,000 mesuku-birds (a bird of prey)
- 1,000 qaribu-birds (possibly crows)
- 10,000 doves
- 10,000 sukanunu-doves (possibly turtle doves)
- 10,000 other assorted small birds
- 10,000 assorted fish
- 10,000 jerboa
- 10,000 eggs
- 10,000 jars of beer
- 100 containers of fine mixed beer
- 10,000 imported skins of wine
- 1,000 wood crates of vegetables
- 300 containers of oil
- 100 pistachio cones
Unfortunately, Ashurnasirpal II failed to succumb to his high-fat, high-cholesterol, low-nutrient diet, either at his feast or later. He lived to crush his neighbors and create wall reliefs depicting these conquests for another 20 years. Ashurnasirpal II is remembered today for two reasons: his great feast and his great brutality. —Shauna ✥✥✥✥✥ Originally posted 2 June 2012 at http://shaunaroberts.blogspot.fr/2013/06/a-cruel-conquerers-grand-assyrian-feast.html.
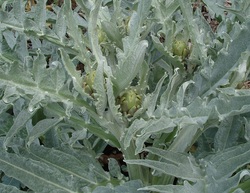 Artichokes aren't a great crop for a tiny veggie patch, but if you have the space, the plants are heraldically spectacular. (They grow over a yard high and wide, with long, deeply-serrated leaves.) The first flowering spike often dies back after it has produced its yearly crop of buds, but, with any luck, small plants (offsets) will develop around the base of the original plants, and eventually your tiny seedling will turn into a multi-stemmed monster (a bit like rhubarb, but BIGGER.) If you're lucky, the resulting clump of artichoke stems will flourish for years, producing multiple buds in spring for you to snap off and cook.
(You already knew that the bits we eat are the flower buds, didn't you? And that if you don't pick them, the buds will develop into huge prickly purple thistle flowers? And, indeed, that artichokes are edible thistles, domesticated in North Africa and loved by the Romans? Of course you did!)
But beware. Just as artichokes are a delicacy for us humans, the leaves are apparently considered delicious by a whole range of bugs. Mine had a bad attack of aphids this year (far too many for my resident ladybirds to control), followed by leaf miners. I pruned off the oldest, biggest and worst-infested leaves, squashed the aphids on the younger, less affected (which took more hours than you can imagine,) baited the ants again (the Argentine ant supercolony here loves to farm aphids on my plants), and studiously ignored the leaf miners.
I don't know how commercial growers get the HUGE buds that you see in stores. Mine never reach anything like that size; they're more like golf balls than tennis balls. But the first bud on a plant - the first one, on the tallest stalk of the plant - is always the biggest. (Once you pick it, the plant will develop smaller buds on all the side shoots.) You have to use your judgement about when to pick any of them, but err on the side of small and delicate. Remember that the true delicacy is the baby artichoke. And, if you pick them as babies, you'll never have to worry about cleaning the hairy inedible choke out of the middle of the bud. (If you ever have to do it, just cheat by cutting the artichoke in half, then use a sharp teaspoon to scrape out the spiky fluff.)
To pick your artichokes, just snap the buds off the stem, one by one, leaving as much stem attached to each of them as you can without also picking the next teensy baby buds further down the stem, and take them inside to cook.
If you're the sort of person who orders whole artichokes in restaurants and carefully tooth-scrapes the edible bit from the base of the outer leaves until you reach the delicious heart, you get the award for patience. I prefer to trim them right down to one delicious bite-size before I cook them.
Starting with baby artichokes (golf-ball-sized) makes the whole process very simple. Start with your just-picked artichokes soaking in clean water, to flush out any insects hiding between the "petals" of the buds. Drain them. You will need a saucepan big enough to hold about 1/4 of the bulk of the buds, after you've trimmed them. (Yes, you lose a lot. It's good for the compost, though.)
Put water about one and a half inches deep into that saucepan, and a big splash of decent vinegar - preferably cider or white wine vinegar. Then pick up one of the artichokes and start snapping off the leaves, working from the base. After a while, you'll find that the leaves change: they'll be more vertical, and mostly yellow, tinged with green at the top. Stop pulling the leaves off at that point. Cut off the top 1/3 of the bud, and pare off the hairy green outside skin of the base and the attached stem, and any damaged bits. (The stem near the bud is just as delicious as the artichoke heart.) The artichoke flesh oxidizes to dark grey very fast. As soon as it looks cute enough, drop it into the water-and-vinegar mix. Then pick up the next one, and the next, and the next. If any of them are bigger than bite-size, you can cut them in half, or even quarters, lengthwise. When you've done them all, bring the water in the pan to a gentle boil, and simmer for ten minutes. Leave the artichokes to cool in the saucepan for a while, then drain them into a pretty dish and pour some fairly decent olive oil over them as a lovely glistening coating. You can add salt and pepper then or later. Then put them in the fridge. They seem to taste better once they're cold, and even better the next day.
You could add them to salads, but you'll probably find that there are fewer in the dish every time you open the fridge, and by the time you come to construct the salad, there's only ever one artichoke left. (I blame the fridge elves.)
--Jenny
According to ancient medical expert Galen, bear meat should be boiled twice before eating. Erk erk erk. (This horrifying fact brought to you via Food in the Ancient World from A-Z by food historian extraordinaire, Andrew Dalby.)- Jenny
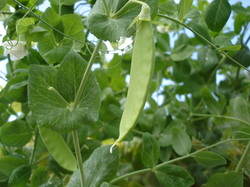 Forget the people who tell you to start gardening with radishes or carrots. Snow peas are much nicer than radishes or carrots, and they're easy peasy - the easiest and most rewarding of vegetables to grow. They're usually ridiculously expensive to buy, mostly because they need careful manual picking every day or two. Harvesting machines won't work! But that's not a problem at home.
If you can grow sweet peas, you can grow snow peas. The seeds are large, reliable and easy to plant, so there's no advantage in buying seedlings. Just get an inexpensive packet of snow pea seeds, and check the right time to plant them for your area, then put them in a sunny spot with a sturdy trellis for them to grow up - just like you would with sweet peas. When the seeds sprout, you might need to protect them from foraging birds, because the sprouts are tender and delicious. The baby plants will soon twine up their support, and in a few weeks you will see white flowers. They're not fragrant and pretty like sweet peas, but each of them will develop into a lovely crisp snow pea. Yum! Pick them when they are about the length of your index finger, and they will be incredibly sweet and delicious. At first it will take a few days to collect enough to make a meal, but keep picking them, and they will produce more and more.
It's a good idea to start a new batch of plants in another sunny spot a few weeks after you plant the first batch. It's insurance in case bad weather or inconvenient animals destroy the first batch. Also, you will need to plant a replacement for the snow pea plants, sooner or later. Snow peas won't live for more than a couple of months. The older leaves and the stems will get dried and yellow, and look mottled and nasty. When they stop producing, just pull out the old plants and put them in the compost.
COOKING
You may find that you don't need to cook the snow peas, because people in the household munch them down all raw and crunchy before you get a chance.
If you do want to cook them, be sure not to overcook. Different people like different levels of trimming, and different levels of cooking. At a minimal level, you can wash them and put them in a heatproof bowl, then pour boiling water over them and leave them for a few minutes before draining and eating. Some people may want to pull or cut the tops and tails off them. Some people may want to microwave them (in water, or else they go yellow and soggy) for a minute or two. Some people may want to steam them. And they are delicious thrown into a soup, stew or pasta sauce a few minutes before serving.
- Jenny
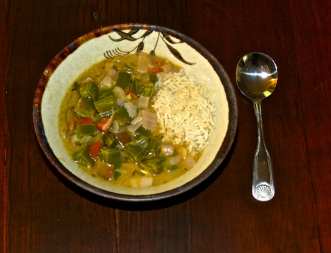 Bowl of cactus leaf gumbo on antique French farm table One morning, I went out to my garden and discovered that coyotes had climbed up our large cactus to eat the half-ripe fruits. All the prickly pears (tunas) I had looked forward to making into jam and drinks were gone.Also gone were many of the cactus's huge leaves. They had not been strong enough to support the coyotes’ weight and now littered the ground. I planted most in my cactus garden; two I kept for cooking; one led to this recipe.If you have not made gumbo before, you may wish to refer to my earlier post "Cajun Gumbo Made Easy."Cactus Leaf Gumbo Ingredients3 cups nopales (cactus leaves), thorns removed and chopped into ½-inch cubes, measured after chopping
olive oil for coating
salt
½ cup canola oil or other cooking oil with a mild flavor
½ cup white flour
3 medium onions, chopped into ½-inch squares
2 green bell peppers, chopped into ½-inch squares
1 cup sliced celery
6 cups cups “no chicken” chicken broth or tomato-free vegetable broth
3–4 bay leaves (fresh or dried)
6–8 large sprigs of thyme (any edible variety) or 1 teaspoon dried thyme
2 teaspoons chopped garlic
1 teaspoon ground chipotle chile pepper
¼ teaspoon ground cayenne pepper
Tabasco brand or Crystal brand hot sauce to taste
3 cups uncooked converted rice
1 teaspoon filé powderInstructions 1. Set the oven to 350°F. Toss the nopales cubes with a little olive oil and salt. Spread on a baking sheet with a nonstick coating or lined with a nonstick mat. Bake for 15 to 25 minutes, or until they have given up their moisture and become soft. Let sit until cool enough to handle. 2. Meanwhile, make a brown roux: Heat the ½-cup oil in a heavy-bottomed kettle. Gradually add the flour, whisking constantly. Cook until the mixture turns the color of peanut butter, being careful not to burn it. It should smell of toasted nuts. 3. Add the onions, green bell peppers, and celery and sauté for 5 minutes or until the vegetables start to soften. 4. Add 1 cup broth and stir over medium heat until the mixture is very thick. Continue adding broth 1 cup at a time until the mixture has the consistency of a runny sauce or a thick stew. This will take 5 to 6 cups of broth. 5. Rinse the oil, salt, and sap off of the baked nopale cubes and add to the mixture. Stir in bay leaves, thyme sprigs or dried thyme, chopped garlic, chipotle powder, cayenne, and hot sauce. 6. Simmer the gumbo for 1 to 4 hours. 7. Cook rice according to rice cooker or package directions to be ready at mealtime. 8. When rice is done, add filé powder to gumbo and remove thyme stems and bay leaves. 9. Serve the gumbo in bowls over rice.
Animal sacrifice in ancient Greece was seldom a terrible "sacrifice," as we moderns use the word. Occasionally the entire animal was burnt on the altar for the god or gods, holocaustos (wholly burnt) - but this was rare. Usually, an animal sacrifice meant a major party, with meat for everyone, and only bones wrapped in fat burnt as the gods' portion. Indeed, the current scholarly consensus, according to all the best books about food in ancient Greece, is that flesh meat was seldom eaten except as part of a sacrifice - which were by no means all major state occasions. A sacrifice could be arranged by anyone who could pay for the animal and for the mageiros, the specialist sacrificer and cook who did the hard work. I'm adding here a description of a sacrifice from my short historical novel, The Priestess and the Slave. The 5th century BC narrator has suffered a stillbirth that nearly killed her; a year later, her husband is celebrating the birth of a healthy baby to their slave Glukera. 
... A few days later, he held the proper feast for all his friends and relatives, even my parents, hiring a man to sacrifice a full-grown sheep. After the sacrificer-cook slit the sheep's throat and let the beast's blood pour over the small altar in our courtyard, he sliced up the animal on the table he'd brought with him, removed the skin, and wrapped long bones and other morsels in fat to burn on the altar as the gods' rightful portion. We prayed that all the gods would enjoy the smoke, as the sacrificer-cook poured unmixed wine over the flames.
Next, the man cut up the best of the animal's insides, the heart, the spleen, the kidneys and the tender liver, and slid them onto iron skewers. They went on the altar to roast as special treats for the guests of honor. While they were on the flames, the sacrificer-cook skillfully butchered the remaining carcass, cutting the muscle meat into chunks and setting them to boil in a tripod cauldron, with onions, herbs and barley. Slaves mixed great bowls of wine with water, and served it out to all, while we waited for the meat to stew.
I was not sad, during this merriment. The gods had willed my childless state; it seemed to fit, somehow, with my odd ways of thought. I'd been a distant, unsatisfactory daughter to my mother, a constant source of discontent to her. Perhaps it was better that one like me did not bring up a child. Perhaps . . .
Glukera sat her baby boy on my childless lap, and his starfish hands grasped for my empty breasts. I gently disengaged his tiny hands and gave him my gold bangle instead. He made a soft noise, bringing the bright bangle to his mouth, and Glukera smiled at me.
I nodded; it was good. When Kinesias grew to adulthood, he and his future wife would tend the family graves, giving the dead the oil, milk and honey that was their due, as I did now. My own dead baby would not go hungry, down there in the dark earth.
- Jenny
My Rice Pudding Cake is a grab-bag of neolithic elements from across Europe and Asia: rice, milk and eggs. Rice was domesticated in China 12,00 years ago - but my cake uses the Arborio rice bred by Italians for risotto. Our modern dairy cows, along with other cattle, are apparently all descended from 80 or so beasts domesticated from wild aurochs in Iran (ancient Persia) about 10,500 years ago. (Most milk used by the ancients would have come not from expensive, high-status cows, but from the far more democratic, and more readily available sheep and goats.) Eggs from chickens (domesticated in India or Asia) were uncommon in Europe until about the Roman Empire - a chicken was considered an impressive gift in 5th century BC Greece - but eggs from other birds must have been on the human menu since the Paleolithic. _My Rice Pudding Cake is based on the "Golden Lemon-Rice Cake" from Patricia Well's wonderful cookbook Trattoria. It's a fabulously healthy-feeling cake, not too rich and sweet, and every time I've made it, people have asked for the recipe.
The cake is naturally gluten free. It works JUST FINE with lactose-free milk, if you have lactose-free people to worry about as well. And the sugar can be reduced, or replaced with glucose powder, if you have people with sugar problems. (One warning: don't try too many substitutions at once unless you have to. A version made with low-fat lactose-free milk AND minimal sugar is more or less edible, but a touch spartan. On the other hand, the friend I make it for that way thinks it's a luxury compared with no cake at all.) _ Ingredients:
6oz / 180g Arborio rice
1 and 3/4 pints / 1 litre full-fat milk (2% milk is fine, but low-fat milk makes the cake distinctly less luscious.)
5 oz / 150g caster sugar
3 large eggs at room temperature
1 teaspoon of real vanilla extract/essence
1. In a large glass bowl, combine the rice, milk, salt and 2/3 of the sugar. Microwave for about 30 mins (stopping the microwave and stirring every five minutes or so and making sure it doesn't boil over) until the rice is tender and it's a bit porridgey but not quite as thick as risotto. Allow to cool for 20 or 30 minutes. It will form a skin but it doesn’t seem to matter, I just keep stirring it back in. (Note – at this stage, if you just stir in the vanilla and don't bother to add eggs or cook it, it is delicious spooned into bowls as a quick rice pudding.)
2. Preheat the oven to 325F / 170C.
3. Prepare a 10 in / 25cm round pan in your favourite way. I always use silicon paper, with a spot of butter or olive oil to stick it to the sides of the pan.
4. With an electric mixer, or by hand if you’re feeling strong, combine the eggs and the remaining sugar and beat until thick, about 2 minutes. Stir in the vanilla. Next, pour that mix into the rice/milk mixture in the big bowl and stir a bit. Pour it into the prepared pan. It will be really quite gloopy.
5. Place the pan in the centre of the oven and bake until the cake is a pale golden colour and firm in the centre - 40 or 50 minutes. Remove from the oven and let cool in the pan.
6. Turn the cake out onto a plate. The top can be sticky, so put some silicon paper on the plate you turn it with. Optionally, sprinkle with icing sugar through a small sieve/strainer, to make it look prettier. It's great with cream and/or ice cream, and especially good with berries as well.
Bon appetit!
- Jenny Blackford
Beer is an ancient food, dating back about 11,000 years in Mesopotamia and Egypt. In fact, barley may have been domesticated so that people could brew beer.
Humans have been gathering honey for a long time too. A cave painting in Valencia, Spain, from about 8,000 years ago shows two people gathering honey as angry, giant bees buzz around them.
 Today, the White House announced at its blog that President Barack Obama was inspired by home beer brewers to try the ancient art of beermaking himself. Several rounds of brewing experiments ensued, and the White House installed its first bee hive at the White House, which now houses 70,000 bees. Today's announcement said that the White House is now producing beer flavored with its own honey, and it provided a link to two of the White House beer recipes, which are now available here for anyone to make. -- No, I haven't forgotten that I promised to post a recipe for cactus gumbo. The recipe is ready, but many of my New Orleans friends have not yet returned home or do not yet have power. I'll post the recipe in a couple of days.—Shauna
|
 Galette filled with veggies and decorated with an egg.
  Sparkling cider from Brittany.
  RSS Feed